


Mike Bellaire is no stranger to creating beautiful backyard landscaping. For more than 25 years, Bellaire Landscape has been operating in Maidstone, Ont., serving customers in Windsor and Essex County. The landscape construction company, which Bellaire owns and operates with his wife Olivia and his brother Bob, prides itself on attention to detail, with each team member using his or her skillsets to create unique designs.
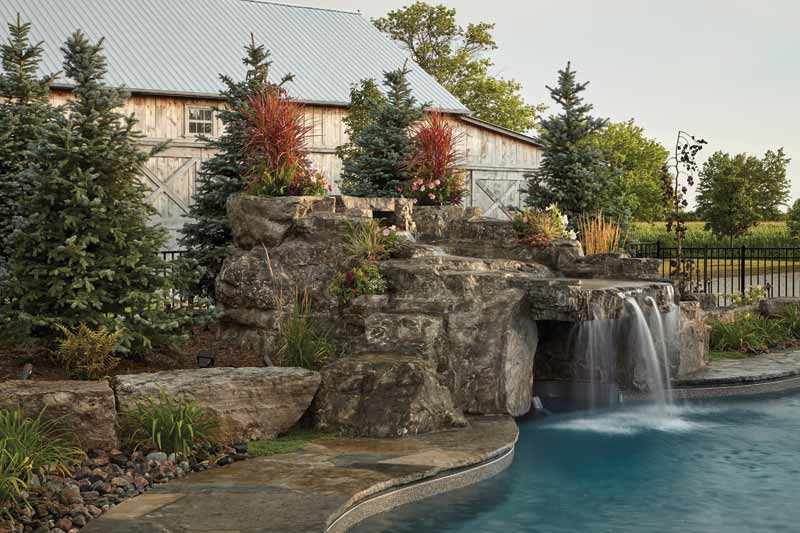
Thus, it was no surprise when Bellaire Landscape was commissioned to design and create a large, custom-built stone waterfall for a residential pool. Hand-stained to match the surrounding natural stone, the completed project serves as a focal point for both the backyard and the home.
Imitating nature
Bellaire Landscape receives most of its business through referrals and this project was no exception. A client was interested in renovating his yard to incorporate the features of a traditional cottage in order to provide his family with daily access to these amenities rather than having to travel elsewhere to relax and unwind.
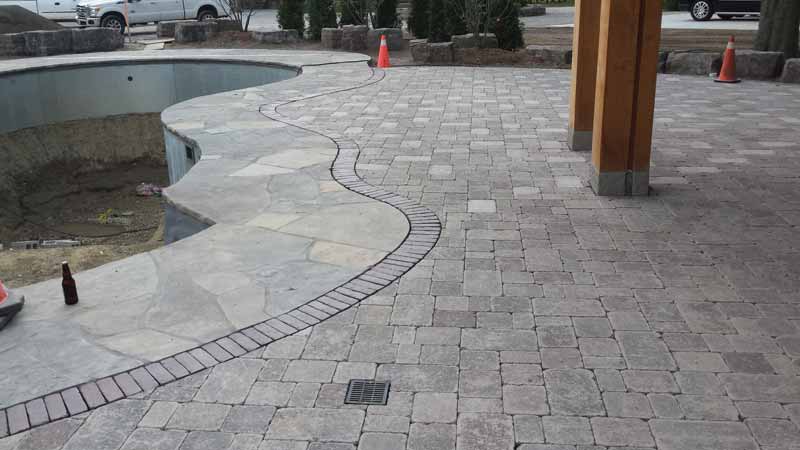
To achieve a ‘cottage in the city’ effect, Bellaire designed the landscaping around the entire house to create a cohesive outdoorsy feel, with key components including a pool and an expansive multi-functional outdoor living space. Specifically, he incorporated natural stones throughout both the back and front yards, which unified the two separate areas and established the project’s overall tone.
Freeform pool
An efficient designer, Bellaire used high-quality 3D renderings and video to illustrate his vision to the client.
The plans called for a 6- x 12-m (20- x 40-ft) freeform vinyl-lined pool, and Bellaire worked closely with the builder to ensure every detail of the installation integrated with the landscape design. He selected dark grey acrylic steps for the pool, and a matching ‘buddy seat’ for under the waterfall. The latter created an obscured grotto in which swimmers could sit while having water cascade over them.
To complement these elements and enhance the overall natural colour scheme, Bellaire selected a vinyl liner with a pattern that imitates the appearance of small, river pebbles in dark grey and warm earth tones.
The pivotal waterfall
Designed as the project’s focal point, the waterfall is visible from the home’s interior, as well as from the outdoor living area. Further, the shape, colour, and flowrate are orchestrated to be appreciated from any angle.

“The placement of the waterfall was chosen not only for its position on the pool, but also for how it was seen from the home’s kitchen window,” says Bellaire.
In order to achieve its focal purpose (as well as fit proportionately into the landscape), the waterfall itself needed to be quite large. Specifically, it was scaled so it was visually in sync with its surroundings, including the pool, backyard, outdoor living space, and residence.
The waterfall structure is roughly 5.5 m (18 ft) in length, 6 m (20 ft) wide, and comes back off the pool edge about 4.6 m (15 ft). In terms of height, it is approximately 0.9 m (3 ft) above the pool’s water level at its front and 1.8 m (6 ft) above the deck at its back.
While many builders choose to use a pre-fabricated waterfall/grotto ‘kit’ for these types of installations, Bellaire instead prefers his craftsmanship. For this custom project, he purchased rock panels and trimmed them down to suit the design plans.
Construction
The waterfall took about five weeks to build. First, Bellaire and his team needed to create sturdy footing capable of bearing the weight of the cast-concrete rock pieces. While this material was selected, in part, because it weighed a fraction of that of natural stone, it still required the support of a sizeable foundation. The waterfall’s interior structure is comprised of cinderblocks reinforced with rebar and then concealed by the cast-concrete stones.
Unlike artificial rocks of the past, which were often cast from rubber moulds, today’s component systems are cast from actual rocks to appear more realistic in shape, character, and texture. Additionally, this material is durable and well-suited to Canada’s freeze-thaw temperatures.
Design
With the foundational pieces set in place, Bellaire was able to begin the project’s real artisan work: the cutting, sizing, and placing of the cast-concrete stones.
Bellaire began by lining both sides of the waterfall with natural rocks, working to mimic and match the colour and texture with that of the cast-concrete material by staining and texturing the artificial pieces to match the real stone. To achieve the desired look, these pieces required many layers of staining, which were applied before and after installation.
“I spend a lot of time standing back and looking at the cast-concrete pieces in relation to the real stones,” Bellaire says. “I make adjustments and modifications as I go. It’s a very visual process.”
To further replicate the appearance of a natural waterfall, Bellaire incorporated live plants within the faux stones. The individual planting areas, which resemble rock-growing plants that are often found within a natural waterfall, also include a complete built-in irrigation system.
| CONSIDERATIONS WHEN PLANNING A GROTTO |
| Construction As interiors of cast-concrete rock waterfalls are comprised of a steel structure, a bond wire is generally required to satisfy building codes. The concrete pad should have a bond break at the pool shell and should slope toward the pool.It is also recommended there be at least 102 mm (4 in.) of concrete on the pad. The construction of caves and grottos also requires concrete backfill. Additionally, the cast-concrete rocks can be pre-drilled with 9.5-mm (0.38-in.) threaded eye bolts to allow the attachment of mesh or solid safety covers, which are typically used when closing a pool for the season. Placement Handholds Mortar techniques Mortar should be easy to trowel into place—it should not be too runny or stiff. Mortar beds should be 25.4 mm (1 in.) or more for base pieces and less for smaller rocks. For maximum bonding, mortar can also be scrubbed to the underside of the rock. Once applied, the mortar should be left to set. After it has hardened, it can be cut and brushed away. A slight undercut will provide a nicer finish. Some installers use antiquing to age the joint after the mortar is dry, while others use rainbow cement for mortar so it will dry the same colour as the castings. |


