

Smoothing things over
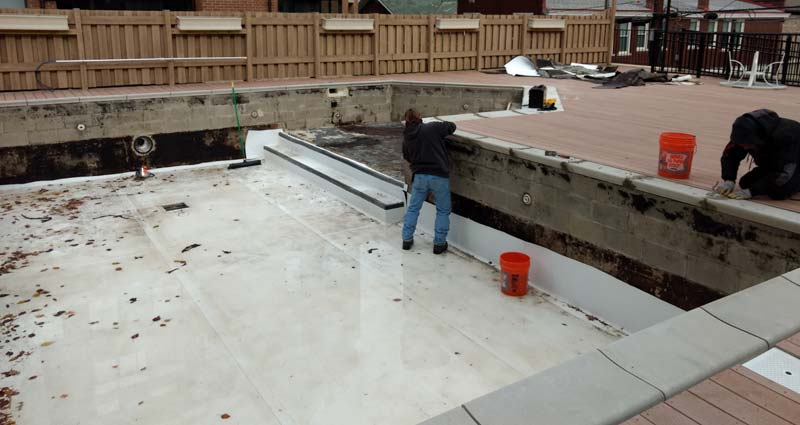


Proper preparation of the pool walls and floors is extremely important when lining a pool with a PVC membrane, as bumps and rough surfaces can be easily seen behind the material after it is installed. Once the surfaces were smooth and treated, the installation team had a clean, workable surface onto which the PVC liner could be installed.
The duration of the cleaning process depends on the area being addressed but, in this case, the entire operation took a full day, using a three-person crew. In other situations, the walls and floors can be in such bad shape that any imperfections must be patched or divots and rough spots must also be repaired and smoothened.
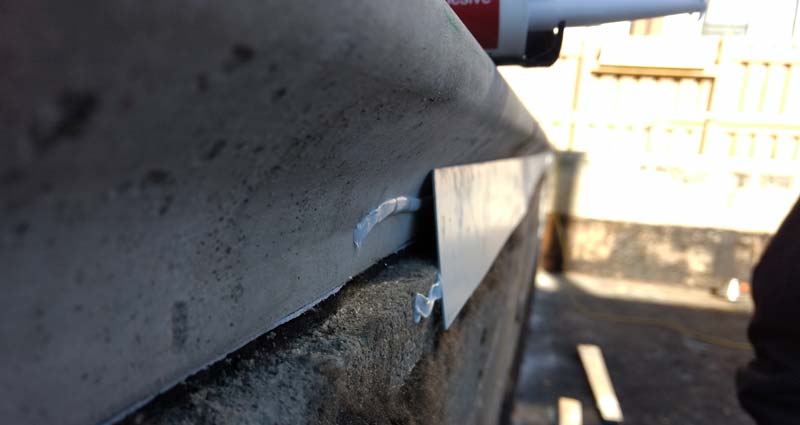
In this particular case, several gaps and joints needed to be smoothened using an acrylonitrile butadiene styrene (ABS) thermoplastic polymer plate. As mentioned earlier, since the PVC membrane is a reflective material, it is important to prepare the pool’s surface to the desired look.
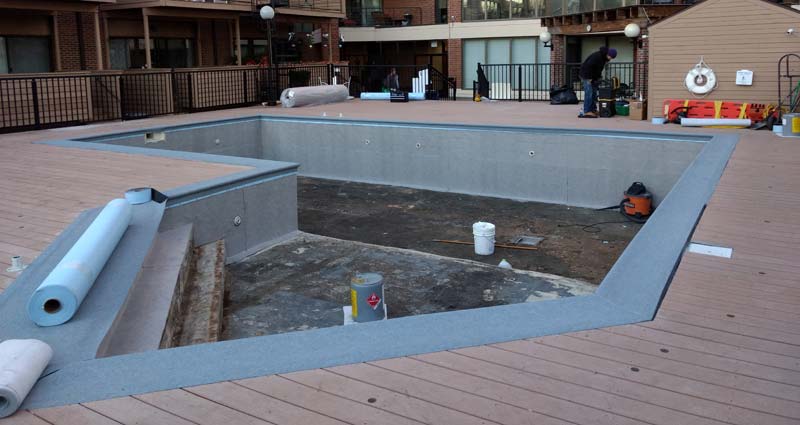
Once the surface preparation was complete, the next step involved applying an adhesive to the pool’s walls and floor to install the felt lining. This 150-mil (11-oz) ‘separator fleece’ acts as a barrier to smoothen any remaining rough areas, as well as provides bathers a cushioned feel to the walls and floor. Cut to size on site, the felt was attached to the substrate using a contact adhesive to ensure a strong, permanent bond.
Lining the pool surface
After installing the felt material, the PVC rolls—each 1.8 (6 ft) wide x 25 m (82 ft) long and weighing almost 91 kg (200 lbs)—were brought to the pool’s edge. The pool has a custom, irregular shape, with the larger rectangular portion being 5.5 m (18 ft) wide x 10 m (33 ft) long. This section is often used for lap swimming, but is primarily designed for play or relaxation as it has a constant depth of 1.2 m (4 ft). An irregular-shaped pentagon entry extends out of the main pool body with stairs stretching 3 m (10 ft) out onto the deck. The steps are approximately 3.3 m (11 ft) wide and descend to the pool floor. The deepest point in this area of the pool is 1 m (3ft).
The customer picked a light blue PVC membrane. Keeping safety in mind, a contrasting 51-mm (2-in.) strip of black PVC would be welded in place to identify stair risers, as well as the transition point from the shallow entry area to the main pool. These markings would also alert bathers to a change in depth for any areas deeper than 1.5 m (5 ft).
Before the PVC membrane was applied, however, a series of fasteners were installed on the top perimeter of the pool. The fastener, a PVC-coated aluminum strip, which is approximately 51 mm (2 in.) wide, were anchored to the pool walls using a rivet or screw. Due to the fragile, hollow nature of the cinder blocks used along the top portion of the pool, great care was taken to attach the fasteners without creating any cracks or causing the cinder blocks to break apart. On the contrary, it is much easier and faster to drill the fasteners in place on pools with solid concrete walls.
Once the fasteners were in place, the PVC membrane was rolled out and positioned inside the pool. The rolls were then measured, custom cut, and tack welded to the fasteners to hold the membrane in place while progressing around the pool. Using a heat gun, the PVC sections were then seam welded on-site. As the membrane is essentially melted together, the seams are overlapped approximately 51 to 76 mm (2 to 3 in.) to ensure a strong, watertight bond. There are a number of options for terminating the membrane at the top of the pool walls, including welding it to the fastener, or attaching it to a gutter.


