Condominium’s outdoor living space gets a much-needed renovation
by jason_cramp | June 22, 2018 12:06 pm
By Steve Comstock
 [1]
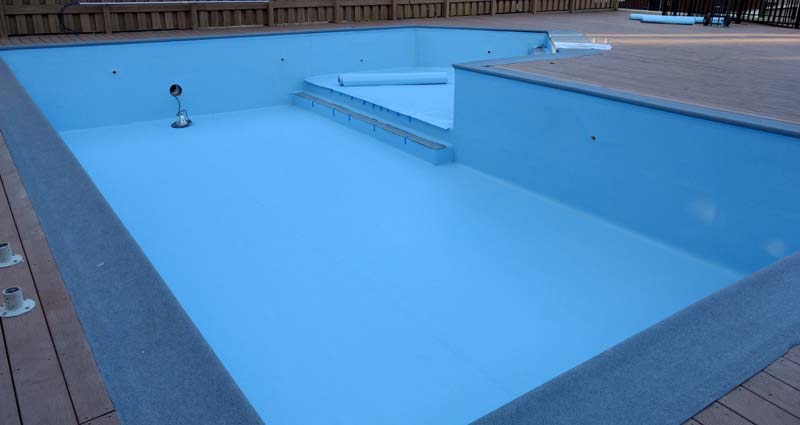
[1]The Riverside condominium complex, located in the historic district of Covington, Ky., is a 10-storey building. It boasts sweeping views of the Ohio River and the Roebling Bridge, and one of the building’s main features is its elevated pool, which is surrounded by outdoor living space. The pool, located in the centre of the structure, is approximately 74.3 m2 (800 sf) and is situated directly above a gated parking garage for residents. After many years of use, it became evident the pool was leaking when water started to appear in the garage.
Having looked into various options to fix the leak, the building’s management team decided on the affordable option of lining the pool with a 60-mil reinforced polyvinyl chloride (PVC) membrane. This would not only make the pool watertight, but it would also give the aging vessel a much-needed facelift.
The pool and deck area are the social heart of the complex, and the condominium association was happy to learn about the option to renovate the resident’s well-loved pool. Another reason the group chose the PVC liner option is that it is relatively quick to install, which meant the pool renovation could be completed prior to the summer.
Getting started
 [2]
[2]This project not only involved lining the vessel with the membrane, but also bringing the pool up to state and local codes. As a result, the skimmers, inlets, lights, stairs, ladder, and pool markings were updated to ensure compliance with current pool regulations. The main drains were also replaced to comply with the Virginia Graeme Baker Pool and Spa Safety Act (VGBA). To do this, sections of the pool floor had to be opened to inspect the existing drain system to make the necessary renovations. The pool also had to be equipped with an Americans with Disabilities Act (ADA) access lift.
Prepping the pool surface
When installing a PVC membrane, several steps must be taken to prepare the pool surface to ensure its long-term success. Often times, the preparation takes longer than the installation.
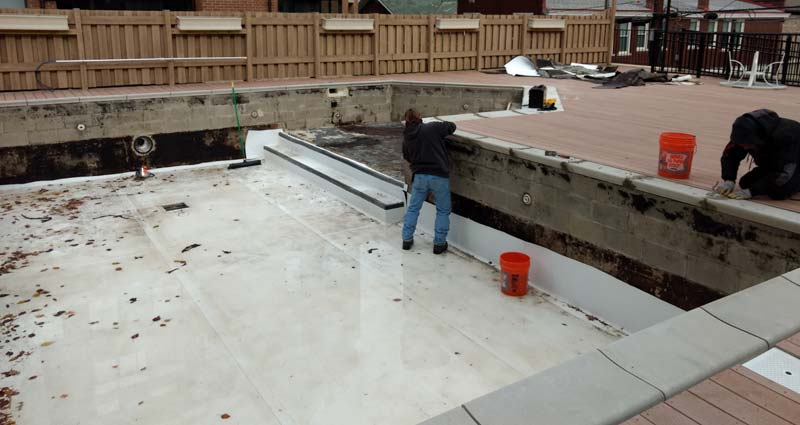
The construction of this pool was unusual to say the least. Concrete was used on the bottom portion of the pool, while cinder blocks were used on the top 0.6 m (2 ft) of the wall around the entire perimeter. Due to its unique construction, particularly the use of less solid and more porous cinder blocks, more time was required to prepare and install the PVC liner. In fact, the details of the pool’s unique construction were not discovered until after the old, leaking liner had been removed.
The first step in the process was removing the old deteriorated liner. Cutting tools were used to slice out and remove the old liner in large pieces, while any material that remained behind the fittings, returns, lights, and main drain were handled with more precision later in the renovation process. Once this was complete, it was discovered the pool walls were covered in a thick layer of mould that had grown behind the previous liner. Further, large portions of the old felt material were stuck to the walls and were very difficult to remove. This was due to the use of the cinder blocks, and their composition, in comparison to solid concrete.
Using scraping tools on the floors and walls of the pool, the installation crew spent many hours smoothing the surfaces in preparation for the new PVC liner. The pool’s floor and walls were also treated with a broad-spectrum algaecide to inhibit future growth of algae and mould.
Smoothing things over


Proper preparation of the pool walls and floors is extremely important when lining a pool with a PVC membrane, as bumps and rough surfaces can be easily seen behind the material after it is installed. Once the surfaces were smooth and treated, the installation team had a clean, workable surface onto which the PVC liner could be installed.
The duration of the cleaning process depends on the area being addressed but, in this case, the entire operation took a full day, using a three-person crew. In other situations, the walls and floors can be in such bad shape that any imperfections must be patched or divots and rough spots must also be repaired and smoothened.
In this particular case, several gaps and joints needed to be smoothened using an acrylonitrile butadiene styrene (ABS) thermoplastic polymer plate. As mentioned earlier, since the PVC membrane is a reflective material, it is important to prepare the pool’s surface to the desired look.
Once the surface preparation was complete, the next step involved applying an adhesive to the pool’s walls and floor to install the felt lining. This 150-mil (11-oz) ‘separator fleece’ acts as a barrier to smoothen any remaining rough areas, as well as provides bathers a cushioned feel to the walls and floor. Cut to size on site, the felt was attached to the substrate using a contact adhesive to ensure a strong, permanent bond.
Lining the pool surface
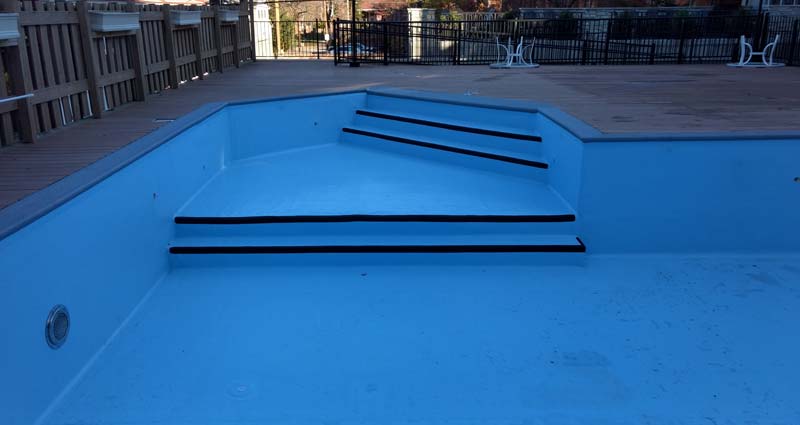
After installing the felt material, the PVC rolls—each 1.8 (6 ft) wide x 25 m (82 ft) long and weighing almost 91 kg (200 lbs)—were brought to the pool’s edge. The pool has a custom, irregular shape, with the larger rectangular portion being 5.5 m (18 ft) wide x 10 m (33 ft) long. This section is often used for lap swimming, but is primarily designed for play or relaxation as it has a constant depth of 1.2 m (4 ft). An irregular-shaped pentagon entry extends out of the main pool body with stairs stretching 3 m (10 ft) out onto the deck. The steps are approximately 3.3 m (11 ft) wide and descend to the pool floor. The deepest point in this area of the pool is 1 m (3ft).
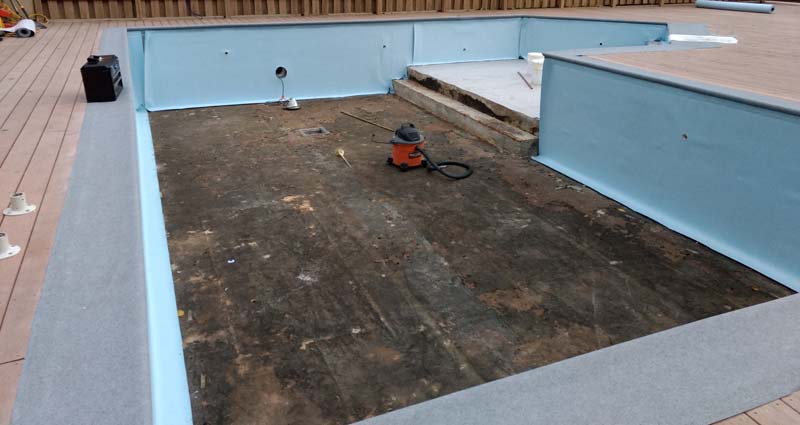
The customer picked a light blue PVC membrane. Keeping safety in mind, a contrasting 51-mm (2-in.) strip of black PVC would be welded in place to identify stair risers, as well as the transition point from the shallow entry area to the main pool. These markings would also alert bathers to a change in depth for any areas deeper than 1.5 m (5 ft).
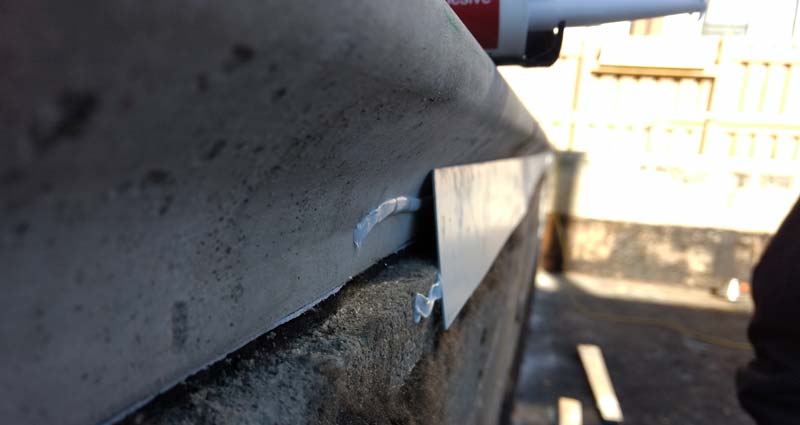
Before the PVC membrane was applied, however, a series of fasteners were installed on the top perimeter of the pool. The fastener, a PVC-coated aluminum strip, which is approximately 51 mm (2 in.) wide, were anchored to the pool walls using a rivet or screw. Due to the fragile, hollow nature of the cinder blocks used along the top portion of the pool, great care was taken to attach the fasteners without creating any cracks or causing the cinder blocks to break apart. On the contrary, it is much easier and faster to drill the fasteners in place on pools with solid concrete walls.
Once the fasteners were in place, the PVC membrane was rolled out and positioned inside the pool. The rolls were then measured, custom cut, and tack welded to the fasteners to hold the membrane in place while progressing around the pool. Using a heat gun, the PVC sections were then seam welded on-site. As the membrane is essentially melted together, the seams are overlapped approximately 51 to 76 mm (2 to 3 in.) to ensure a strong, watertight bond. There are a number of options for terminating the membrane at the top of the pool walls, including welding it to the fastener, or attaching it to a gutter.


In the process of applying the PVC liner, the main drain, skimmers, inlets, and returns were also carefully terminated by using a custom-made PVC flange that was anchored with stainless steel fasteners to compress the membrane to the pool’s substrate. To ensure a perfect, watertight seal, the flanges are manufactured after being carefully measured by the installation crew. Once the flanges are ready, they are shipped from the factory to the jobsite for installation.
The depth markers, within the pool and on the deck surface, are also custom-made at the factory and applied on site.
Pool edge ‘sitting’ surface
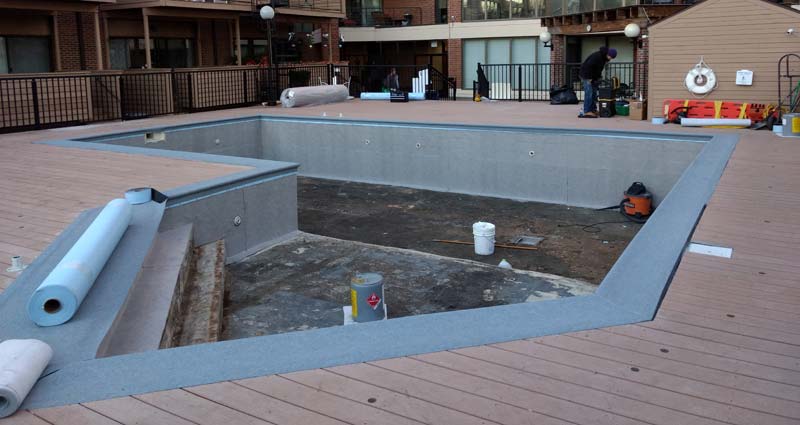
During project discussions with the condominium association, it was discovered many residents enjoyed lounging around the pool, specifically sitting at the edge and dangling their feet in the water. Therefore, the client decided to replace the coping along the pool’s perimeter, as the initial installation was completed in a manner that left large gaps between the stones and the pool deck. Further, many of the stones were chipped and not sealed properly; therefore, it was recommended the renovation be completed using PVC flooring, which is made from a thick material that is soft and comfortable to sit on.
Designed for indoor and outdoor applications, this 85-mil, pre-felted PVC membrane is slip-resistant and independently certified to ASTM International standards for use in wet or dry conditions. Stabilizers and inhibitors prevent the material from fading due to ultraviolet (UV) light and chemical exposure, while biocides formulated into the material also make it algae- and fungus-resistant. The PVC surface would not only give the pool an updated, clean look, but would also make it easier for staff to maintain, using a mop, pressure washer, or sponge.
With these benefits in mind, the condominium association agreed to the installer’s recommendation to encapsulate the coping stones in the PVC material. Further, by using this product, it would allow the installers to heat weld the PVC pool liner membrane directly to the deck surface to ensure a watertight transition between the two products.
For this project, the decking surface was installed using additional foam between the existing coping stones and the PVC for added comfort. Much like the installation of the PVC pool liner, a strip of PVC-coated aluminum was screwed into the coping stones, along the perimeter of the pool, to attach the flooring material. Prior to installing the deck material, the coping stones had to be primed using concrete filler and silicone to seal any gaps, while the large space between the coping and the composite wood deck was filled using a silicone material to give the pool a clean finish.
The condominium association selected a grey flooring material for use around the pool perimeter, which complemented the pool’s blue interior finish.
The results
This project was completed last fall with the goal of having it tested and ready to open as soon as the weather warmed up this spring. Outdoor pool renovations like this one must be completed during temperatures in excess of 4.5 C (40 F). The PVC material is difficult to work with in temperatures below this threshold. Thanks to ideal temperatures, this renovation project was finished within 10 days. Once completed, the pool was filled and tested before being winterized.
By renovating the pool, the condominium association achieved its goal in replacing the tired, leaking vessel, breathing new life into the outdoor living space where residents can have fun with family, meet friends, read a book, or enjoy a poolside beverage for many years to come.
 [3]Steve Comstock is the president of RenoSys Corporation, a company specializing in commercial pool renovations based in Indianapolis, Ind. He has worked in the commercial aquatics industry for more than 38 years and has helped renovate thousands of commercial pools across Canada and the U.S. Comstock can be reached via e-mail at stevec@renosys.com[4].
- [Image]: https://www.poolspamarketing.com/wp-content/uploads/2018/06/IMG_20171204_082603285.jpg
- [Image]: https://www.poolspamarketing.com/wp-content/uploads/2018/06/IMG_20171122_080419491.jpg
- [Image]: https://www.poolspamarketing.com/wp-content/uploads/2016/10/Comstock_Headshot.jpg
- stevec@renosys.com: mailto:stevec@renosys.com
Source URL: https://www.poolspamarketing.com/trade/features/case-studies/condominiums-outdoor-living-space-gets-much-needed-renovation/