Creating natural looks for artificial rock formations by backyard pools
by arslan_ahmed | August 31, 2023 5:50 pm
 [1]
[1]By Zayvian Camacho
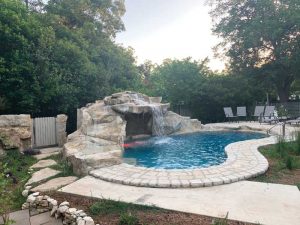
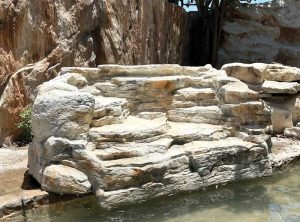
Using cast concrete artificial rock to craft a captivating water feature is a simple yet enchanting method for transforming any backyard pool into a resort-like oasis. Today’s cast concrete rock component systems look real because they are cast from real rocks to provide the same shape, character, and texture. More pool builders are using cast concrete rock because it holds up extremely well to the freeze-thaw temperatures in Canada and the northern U.S.
To achieve a striking resemblance to natural rocks, it becomes imperative to apply staining and mortaring techniques to the cast concrete product. These methods, employed with finesse, contribute to creating a visually captivating and authentic rock water feature. Discovering various tips and tricks in staining and shading is essential to deliver the most alluring and appealing result to one’s clients.
Staining and shading
When it comes to staining and shading cast concrete rocks on water features, it is important to be sure they blend seamlessly into the pool’s surrounding decks.
Builders can use various concrete stains as a cost-effective method to create beautiful decks surrounding the pool. As part of this process, the cast concrete water features should also be stained and shaded to match the surrounding natural rocks and pavers.
 [2]
[2]Staining concrete is a real art form and, for some experienced builders, staining a cast concrete water feature can be easier than getting natural stones to co-ordinate and look good together. Cast concrete manufacturers provide kits to dye the concrete stone to mimic the surrounding natural hardscaping and deck treatments. A blend of acrylic stains specially formulated to bond to cast concrete rocks should be selected. There are stains and paints in the marketplace that are formulated to bond to porous surfaces and not to high tech waterproof products such as fibre-reinforced concrete (FRC) that is manufactured for pool water features.
Natural stones absorb stains differently than artificial rock. In fact, cast concrete rock absorbs even less than shotcrete types of rock. As a result, many pool builders find staining and shading of custom work ideal to ensure the colours blend within the pool’s surroundings.
 [3]
[3]Getting started
In terms of tools, having a bucket, hand sprayer, water hose, and a sponge are tools a builder needs. It is recommended builders begin the staining process at the back of the hardscape feature and work toward the front. It takes a good eye and some patience to get the cast concrete to resemble real stone. Testing small sections at the back of the water feature is always a good approach as hardscape designers master the art of staining concrete.
Many layers of staining are necessary to achieve a realistic and natural look. Applying these layers of stain happens both before and after the placement of each piece. The initial staining is applied before placement and the final staining is completed after the water feature is assembled.
Some manufacturers offer the convenience of pre-staining the artificial rock at their factories, relieving the builder of the bulk of the colouring process. This way, builders only need to focus on touch-up colour applications for mortar joints or smaller patches, as needed. It streamlines the construction process and ensures a more efficient and seamless execution of the project.
With custom staining, builders must allocate time to step back and observe the cast concrete in conjunction with the pool deck and any real stones that might be integrated into the surrounding landscape. This visual assessment is crucial, as the process involves a certain degree of artistry. Therefore, builders should be prepared for adjustments and modifications to achieve the desired esthetic harmony. It requires a keen eye and a creative approach to ensure the result complements the overall landscape and pool design seamlessly.
 [4]
[4]In every scenario, ensuring the water feature rock colour complements and matches the deck finish holds significant importance. Opting for a standard stain colour, rather than custom creating one, simplifies the process of performing touch-ups in the future, should the need arise. This strategic decision enhances long-term maintenance and preserves the visual harmony of the pool area, guaranteeing a lasting and esthetically pleasing result.
Stain like a pro: Rocking the best techniques
To achieve the most realistic and esthetically pleasing artificial rock for pool water features, there are several specific best practice steps one should follow when staining cast concrete. These steps serve as essential guidelines to guarantee an exceptional outcome, making the artificial rock blend seamlessly with the pool’s surroundings, elevating the overall visual appeal of the pool area.
-
 [5]
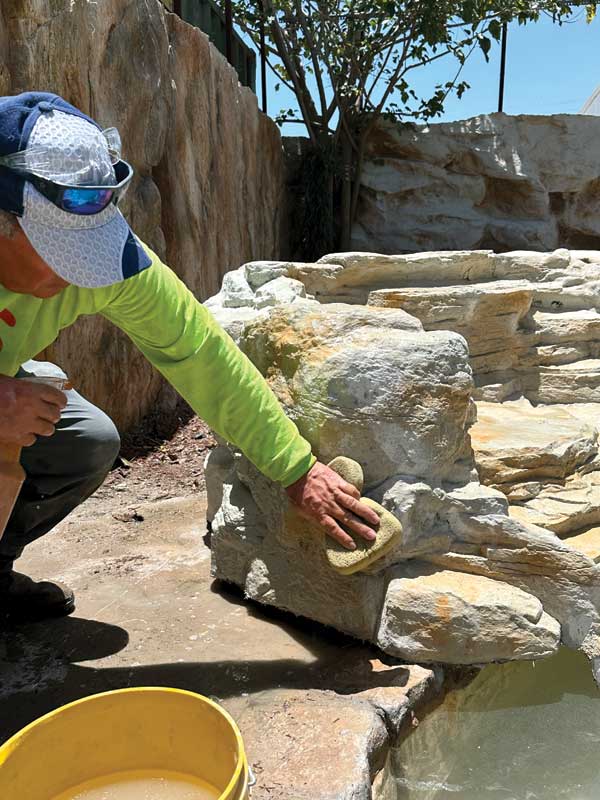
[5]When it comes to staining and shading cast concrete rocks on water features, it is important to be sure they blend seamlessly into the pool’s surrounding decks. Washing
 [5]
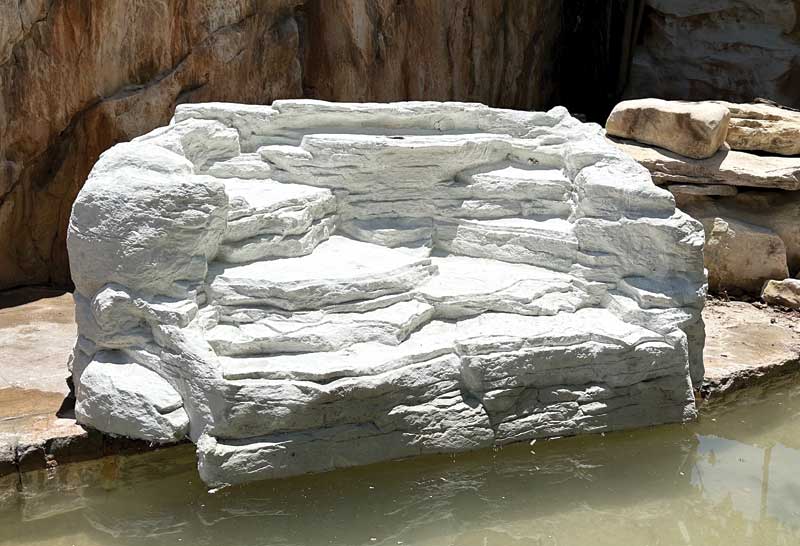
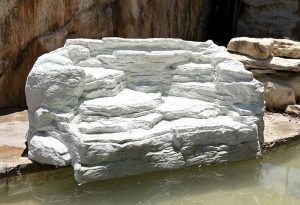
[5]The colour staining process should commence by thoroughly washing off the rocks, ensuring the removal of any substances that might interfere with the colour bonding. It is highly recommended builders use a power washer, as it is an effective method in preparing the surface.
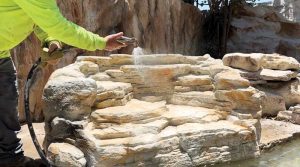
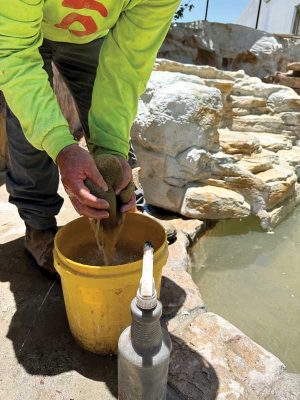
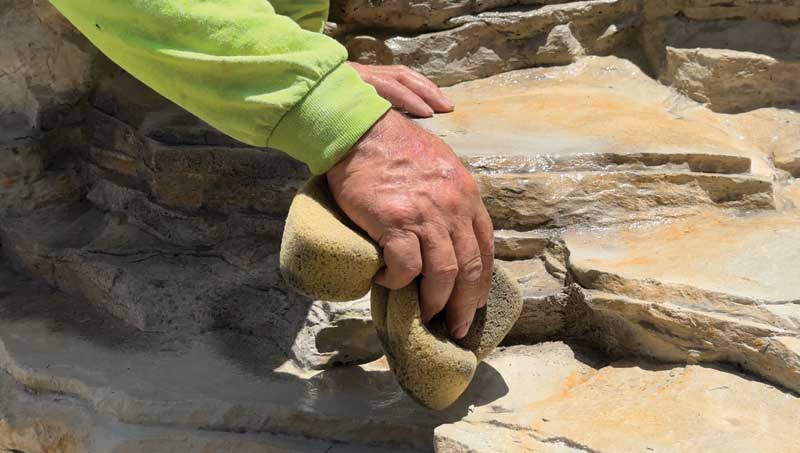
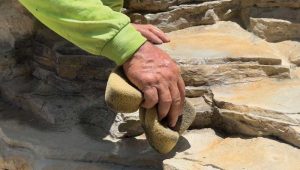
- Moistening
It is important for the acrylic stain to be applied to a moist surface. Experienced builders use large sponges to moisten the cast concrete rocks for the stains to apply properly. It is important to ensure the rock is not too wet or too dry before adding the acrylic stain. If the rocks are too dry, the colour will quickly absorb into the concrete, causing a very dark deep colour. Applying the stain to a damp surface, as opposed to a wet surface, allows the stain to blend with soft tones and hides any “overspray” errors. The intensity of the stain colour is changed by applying it to either a wet, damp, or dry surface.
Builders should consider the outside temperature and allow the rocks to dry for a brief period after wetting them. In particularly hot and dry conditions, frequent re-wetting might be necessary to maintain the optimal moisture level. Striking a balance between not being too wet or too dry is crucial, and the term “damp” aptly describes the desired moisture level. Using a hose to create a fine mist proves to be an ideal method for moistening the rocks and achieving the desired result.
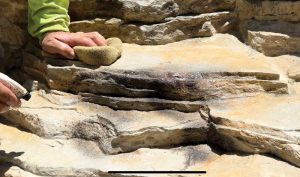
- Application techniques
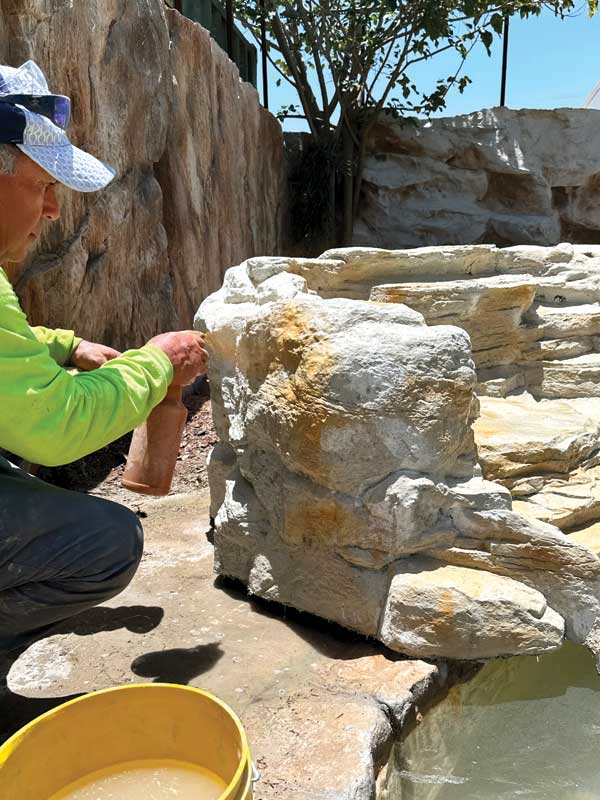
Builders should always begin by applying the accent colour first, which includes rust, reddish brown, and golden amber. These hues serve as the foundation for creating a realistic tone on the rocks. When applying the stain colour, it is essential to do so in a random fashion to avoid creating patterns that can make the artificial rock appear unrealistic.
Using a spray bottle, builders should avoid spraying the same spot twice, as it can lead to excessive saturation or drips. Instead, applying sprays in various random locations prevents unnatural-looking dots from forming. Overconcentrating the accent colours in one area should be avoided, as it can give an unnatural appearance to the colouration. Further, it is important for builders to shake the stain bottle frequently to keep it fully blended during the application process.
 [6]
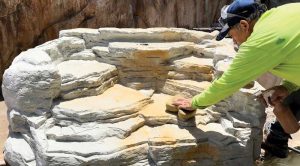
[6]After applying the accent colour to the damp surface, builders can use a clean, damp sponge to either lighten heavily stained spots or blend the tones to match the surrounding colour scheme. By sponging off any excess stain, builders can create attractive variations in hue that contribute to the overall realistic appearance of the artificial rock.
The key to successful artificial rock staining lies in layering the colours gradually, adding small amounts of colour at a time. This approach is much more manageable than attempting to lighten a colour once it is already applied. Some acrylic stains tend to appear brighter after drying, making it essential to apply them slowly and meticulously in light layers. By following this method, builders can simplify the task and achieve optimal results in the staining process.
As with any painting endeavor, drop cloths can prove to be quite useful in preventing accidental dripping on pool decks and other surfaces.
-
[7]
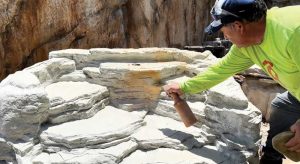
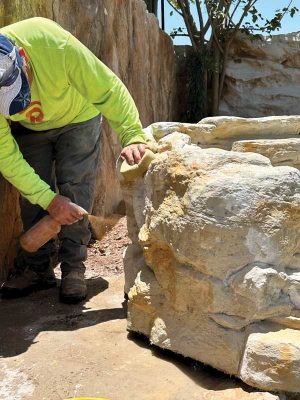
Having a bucket, hand sprayer, water hose, and a sponge are all the tools a builder needs to achieve the most realistic and esthetically pleasing artificial rock for pool water features. Adding colour
 [7]
[7]Once the rock has dried, the stain colours may appear lighter compared to when the surface was wet. At this point, adding more color is advisable, and layering is considered a best practice when staining cast concrete rock. It is much easier to introduce additional colour than trying to lighten the already applied colour. This technique ensures a more controlled and desirable outcome in the staining process.
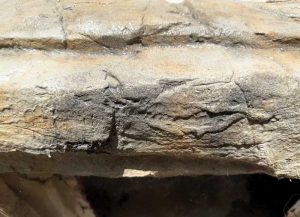
After achieving the desired colour, builders often discover that adding an antique finish is an excellent way to enhance the rock’s appearance, giving them a weathered, natural look that makes them stand out even more. This antique finish is particularly effective in highlighting the natural cracks and crevasses or areas of heavy texture in cast concrete rocks. With its coffee-like hue, the antique finish gives the concrete rocks an aged appearance, eliminating any hint of it being artificial or concrete-like.
To achieve this look, builders should ensure the rocks are damp and proceed to apply the base colour. Next, they should sponge away any excess stain. Once that is done, the rocks should be dampened again before adding the antique finish. This process can be repeated using the sponge. Concentrating the antique finish in the cracks while sponging away the excess from the surrounding areas is essential for achieving pronounced, deep dark cracks. Builders must be attentive during this process and sponge away any dripping, as leaving such marks can compromise the overall result.
Since this is a darker grey, it is important for builders to have a clean damp sponge in hand to be able to remove any excess antique colour from the rock to avoid compromising the accent colour. Further, builders should also be sure the accent colour is dry to avoid having the antique finish mix with the accent colour and inadvertently creating a third colour. Therefore, it is a good idea to finish and allow the initial application to dry for one day before applying heavier layers.
Accent stain colours provide visual interest to the rocks in the water feature. Although natural stones can have intense colour variations, it is best for artificial rock used around pools to have less variations throughout the water feature as clients will find the finished product to be more appealing. Too much stain concentration may draw the eye’s attention to its intensity, potentially creating an eye-sore for the client.
Builders can employ a white-wash technique if they find the need to lighten a heavily stained area or blend the colour to better match the surrounding deck colour. This method proves to be an effective way to soften the rock’s colour by re-wetting it and applying a few drops of a much lighter colour. By blending the lighter colour, builders can effectively lighten the overall colour of the artificial rock to achieve the desired visual effect.
| Essential tips for building artificial rock formations |
| When planning for the installation of cast concrete artificial rock waterfalls, there are several important considerations builders should take into account.
Construction Placement Handholds Mortar techniques |
While the process may be intimidating, there is no need to worry, as there is undoubtedly a natural rock out there that closely resembles the outcome.
Beauty in the details
Creating attractive water features using cast concrete artificial rock is not difficult. By using stains specifically designed for cast concrete and using these techniques, builders can confidently approach the task, realizing it is not as daunting as it may seem. That said, understanding the process requires time, patience, and a touch of artistry is crucial. For those builders who are not up to this task, they may wish to consider the option of using pre-coloured artificial rocks to make the process less intimidating. Many builders, especially those managing high-volume installations, have embraced pre-stained water feature kits to save time and effort when compared to custom staining artificial rock. Either option allows builders to introduce cast concrete water features to their pools to create attractive backyard resorts for their clients.
 Author
Zayvian Camacho is part of the design and fabrication team at Rico Rock, developing new climbing wall, water features, and working on commercial aquatic and non-aquatic construction projects. Camacho studied landscape design and has overseen construction for dozens of unique cast concrete artificial rock projects in backyards, hotel resorts, bowling alleys, zoos, and more. Camacho finds his rock construction work meshes perfectly with his passion for rock climbing. He can be reached at zayvian@ricorock.com.
From bare to bold: The magic of staining artificial water feature rocks


- [Image]: https://www.poolspamarketing.com/wp-content/uploads/2023/08/RicoRock-grotto-day-G_6171.jpg
- [Image]: https://www.poolspamarketing.com/wp-content/uploads/2023/08/RicoRockStainingArticle-Moistening-Rock.jpg
- [Image]: https://www.poolspamarketing.com/wp-content/uploads/2023/08/RicoRock-StainingArticle-applying-color.jpg
- [Image]: https://www.poolspamarketing.com/wp-content/uploads/2023/08/Image4.jpg
- [Image]: https://www.poolspamarketing.com/wp-content/uploads/2023/08/Image10.jpg
- [Image]: https://www.poolspamarketing.com/wp-content/uploads/2023/08/Image16.jpg
- [Image]: https://www.poolspamarketing.com/wp-content/uploads/2023/08/Image11.jpg
Source URL: https://www.poolspamarketing.com/trade/features/creating-natural-looks-for-artificial-rock-formations-by-backyard-pools/