Custom water and fire features
Building custom GFRC rock features
 There are tricks to ensure success with GFRC panels. To begin, pool builders must use a lathe similarly to brick layers. The lathe is used to bridge the gap between the boulders and panels; drill a hole on each side of the panel, then run a zip tie through the hole onto the lathe. The lathe keeps the concrete and mortar from falling off by giving the concrete mortar mix something solid to adhere to.

There are a few ways in which builders provide support to the GFRC panels during the installation process. Some builders bolt them to a concrete support panel as they connect each GFRC panel, while others use what is called a post-and-beam installation, where cinder block walls are built in behind to hold the panels in place.
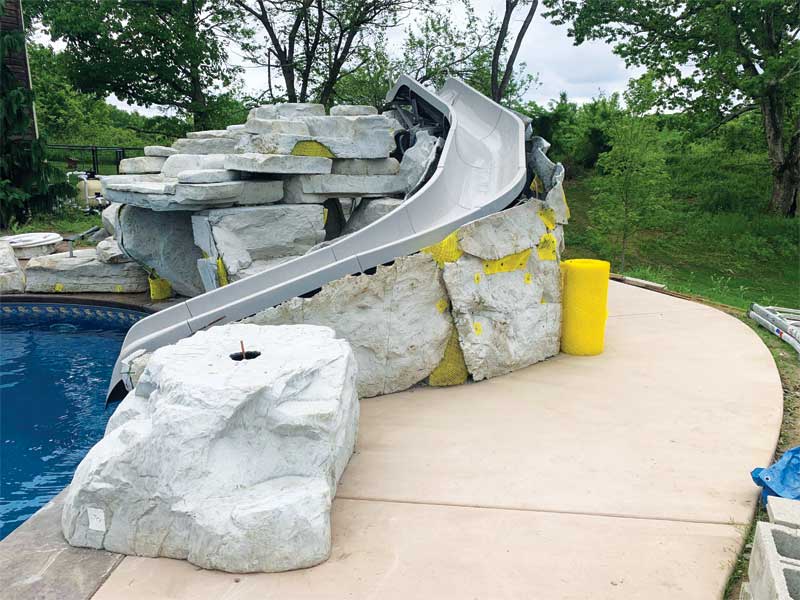
This is particularly important when working with slides because builders should try to avoid connecting the fibreglass slide and GFRC panels—especially in freeze/thaw regions.
“As a result of these severe temperature changes, the fibreglass slide can move through expansion and contraction so you don’t want the slide or the stone to expand and break,” says Lambert. “We design the rock and fibreglass so they don’t touch and, therefore, move independently to avoid cracking. Although they need to be free of each other, we work hard to make it appear as though the slide is fully integrated into the rock.”
There are also some best practices builders should follow when it comes to the mortar techniques used with GFRC panels. Concrete castings can be quite dense and do not absorb water so they must be set with a rich mortar mix. Most masonry supply businesses have a ‘better quality’ mortar mix or cement, which can be blended with masonry sand and tends to work best. Mortar should be easy to trowel into place—not too runny or stiff. It should also be left to set to avoid smearing fresh mortar.
After it has hardened, the mortar can be cut and brushed away; a slight undercut will provide a nicer finish. Some installers use antiquing to age the joint after the mortar is dry, while others use rainbow cement so the mortar dries the same colour as the castings. It is important to remember temperatures should be above 4.4 C (40 F) to ensure the mortaring process is successful.
The artistry of custom GFRC

There is a certain amount of artisan work involved in building with GFRC panels and boulders. Not only is there artistry in the cutting, sizing, and placement of the panels and rocks, but also in the staining and colouring of the materials.
When it comes to sizing GFRC panels, cutting them with a concrete saw is not ideal as there is more potential for error and these saws can not only produce a large amount of harmful dust, but also can quickly make a job site filthy. Once the panel is measured, it is best to use a chalk line to mark where the panel should be cut, then builders should use a hammer drill to make small holes along the chalk line. Next, a mall sledgehammer should be used to tap along the holes to break the panel gently along the chalk line.
In addition to cutting and placing the panels, creativity is needed in the staining process to achieve the desired look. To create a natural looking GFRC panel and boulder, many layers of staining and colour must be applied over multiple days. It is important builders take time to do the staining in stages. In doing so, one should stand back and look at the entire project at different times of the day. The goal is to stain the panels with shadows to mimic the look of real rock. In addition to the panels, all the boulders must be stained to match. After applying the base coat, builders can start adding highlights and shading. The colouring process can take three to four days to replicate the shadowing effect of real rock. This is where the artistry comes in.
“You don’t want to over-do it,” says Lambert. “It is a gradual process. We also like to invite the client to come stand with us and look at the water feature to get their feedback on the staining and colouring as we find the client likes to be involved in the design process and helps ensure the final success of the job.”
Sign up for our newsletter
Get all the latest news and features from Pool & Spa Marketing. Submit your email below to get our twice-monthly newsletter.
Related Products

Read the Latest Issue