Expert tips for safety cover installation

The next measurement the installer should take is from the chalk mark identifying the centre of the strapline on the cover to the next closest strap running lengthwise. Using this measurement, the same distance is measured from the pool centre chalk mark on the deck and a line is drawn away from the pool. This marks the strapline where the first anchor hole will be installed, but not the exact place on the line. Finally, the length of the pool and the cover are measured at these deck strapline marks. Subtracting the length of the pool from the length of the cover and dividing by two will give the installer the base amount of cover overlap from the pool’s edge to the cover edge.
All the careful measuring in the world will be useless if each cover strap is a different length. The easiest way for an installer to ensure the strap lengths are consistent is to use the spring cover as a guide.
The strap length, from the edge of the cover to the end of the spring, should be measured next. This number is added to the base cover-overlap measurement obtained earlier, and another 102 mm (4 in.) are added. This final number tells the installer how far the main anchor holes should be from the edge of the pool. This can be referred to as the ‘magic number.’ It is important the springs are attached right side up.
This ‘magic number’ is used to measure the first hole location from the edge of the pool along the chalk line for the strap, and marked with an ‘X.’ The installer, using a rotary hammer drill with a 19-mm (0.75-in.) masonry bit, should drill a 51-mm (2-in.) deep hole at this location. The pile of cement dust that accumulates around and in the hole should be washed away with a hose, vacuumed, or blown away with a shop vac. The anchor will not sit right if debris remains in the hole.
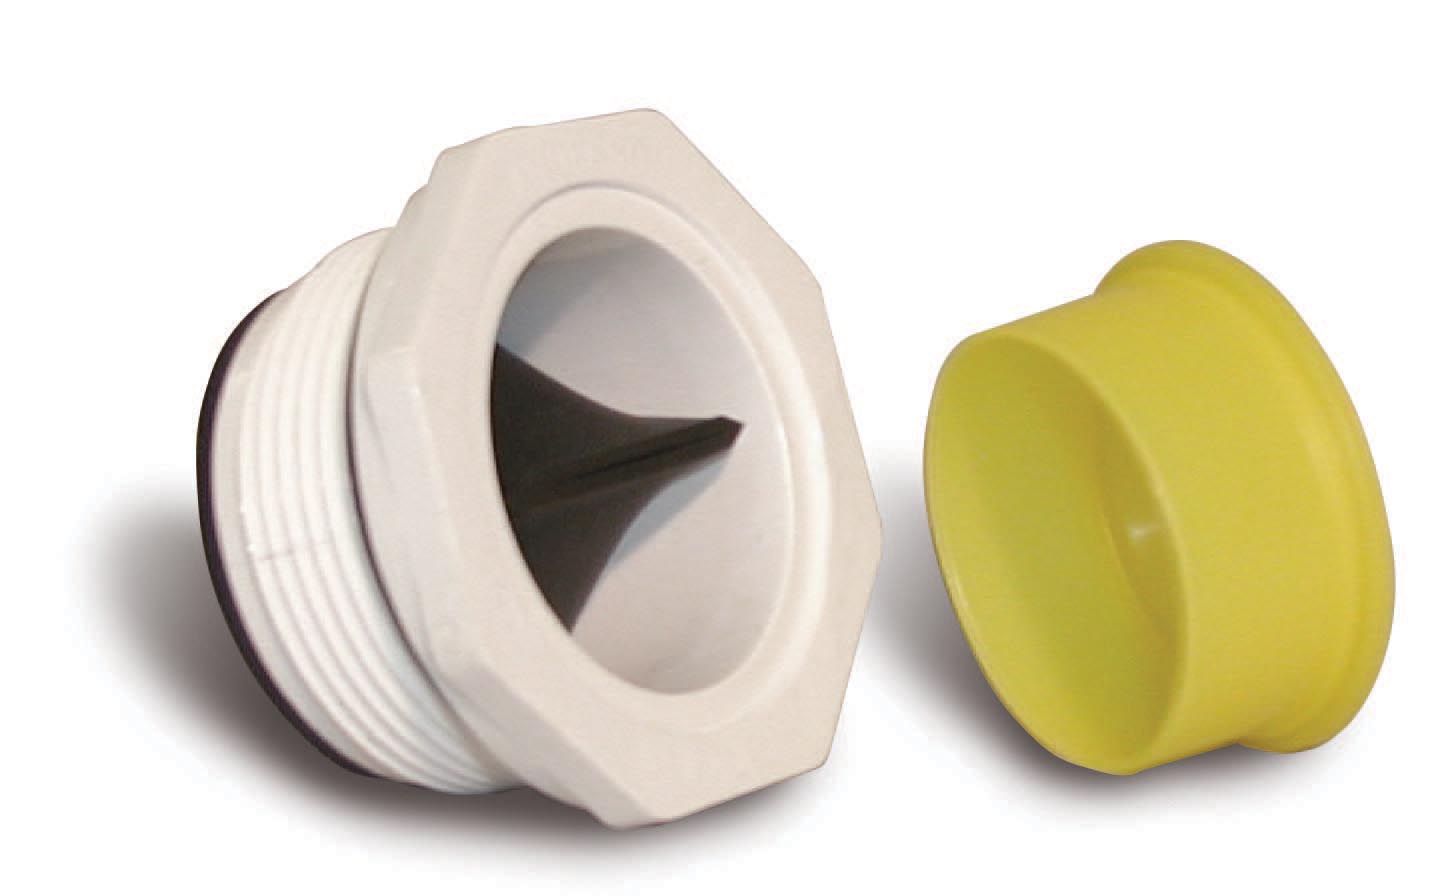
To install the anchor, the installer must first separate it into two pieces. The outer half is placed into the hole and with the tamping tool inserted, the anchor should be hammered down until it is flush with the deck. The other half of the anchor should be fastened until the unthreaded portion remains above the deck.
This process is then repeated at the other end of the pool, marking the centre of the vessel’s width on the deck, the centre of the cover width on the cover, and determining where the strap line should be on the deck for the same strap that was just marked on the opposite end. The ‘magic number’ is used again to mark the second hole before drilling and installing the anchor.
The cover is then attached to the first two anchors using the installation bar. The tension should pull the cover up off the water.
With these anchors in place, the installer can now mark the drill locations on the deck for the anchors on either side of the centre straps, by measuring the distance between straplines and marking the deck that distance from the existing hole. They should be moved away from the centre strap by an extra 25 mm (1 in.) to allow for stretching and to ensure the straps remain straight.

Once the cover is attached to the three centre strap anchors on both ends of the pool, the installer should ensure the cover is centred. This can be done by pulling the sides of the cover as taut as possible and visually inspecting if the ends are on centre. If necessary, adjustments can be made by loosening or tightening the straps on the six anchor points.
Once the cover is locked-in lengthwise, the installer can move on to attaching the first straps across the pool’s width. In doing this, the width of the pool, and the cover, should be measured to determine the base overlap using a strap in the centre of the pool, not one on a large radius. Once again, 102 mm (4 in.) is added to the strap/spring length, plus the base overlap to obtain the ‘magic number’ for the sides. In most cases, this will be the same as the first ‘magic number,’ but not always; therefore, it is best to double-check. Once the centre strap is lined up, the required distance is measured, and the anchor is drilled and installed on both sides, followed by the straps on either side of the centre straps. (A chalk line can be snapped along the ‘magic number’ measurement for perpendicular pools.)
With the cover now completely locked in place with three straps anchored on each side, the installer can work outwards, one strap at a time, and back and forward across the pool, the remaining anchors are measured, drilled, and installed, all while remembering to skew the drill holes slightly away from centre to allow for stretching. This will help to keep the cover taut, the straps straight, and eliminate any puckers in the fabric.
On curved and freeform pools, sometimes the ‘magic number’ will fail due to the angle of the strap and the curve of the wall. Therefore, it is important each hole is measured and marked, and then with the strap pulled tight the marked anchor location should be checked to be 102 mm (4 in.) past the spring.
Corners and extra support straps should be installed last. This allows them to be aligned perfectly straight after the cover has been fully stretched.
Sign up for our newsletter
Get all the latest news and features from Pool & Spa Marketing. Submit your email below to get our twice-monthly newsletter.
Related Products

Read the Latest Issue