by habiba_abudu | September 23, 2019 3:34 pm
By Kevin Harrington
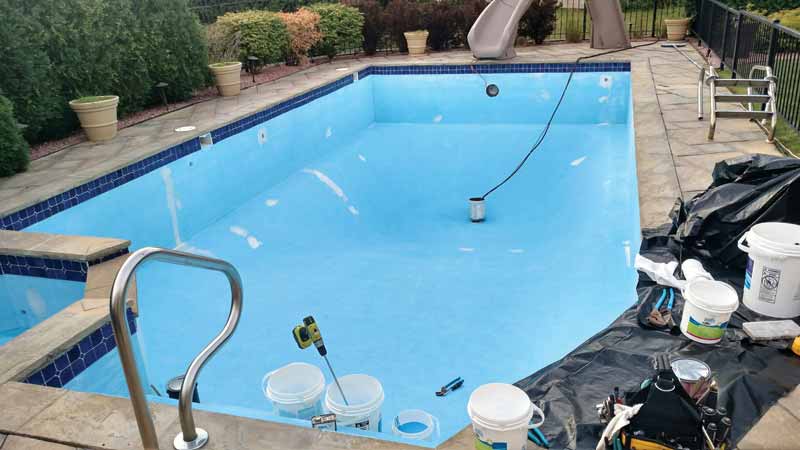
Painting is one of the best ways to protect and beautify both commercial and residential pools. In addition to adding a vibrant, fresh colour, a new coat of paint can be a cost-efficient way to give new life to concrete, plaster, or fibreglass pool surfaces. Painting a pool is not as difficult as one may think. Proper planning, surface preparation, and using best practices from the field will help ensure the best results. This article will discuss the various tips and tricks involved in painting commercial and residential pools, including preparing the pool surface, and choosing the right product—whether it be epoxy, rubber, or acrylic paint.
There are three types of coatings that are suitable for aquatic surfaces:
Water-based acrylic
This paint can be applied over most types of coatings provided they are in sound condition. Additionally, water-based acrylic paint can be used on damp surfaces—which can be especially beneficial in many situations. This is a cost-efficient painting approach and when done correctly, it may last up to two seasons.
Chlorinated or synthetic rubber
Chlorinated rubber coatings provide excellent hiding, protection, and coverage for previously painted chlorinated rubber surfaces. These coatings can also be applied to bare concrete, marcite, or plaster. These finishes are designed to last between four and five years.
Synthetic rubber coatings can be applied over existing chlorinated or synthetic rubber systems, bare concrete, or plaster and is intended for use where adherence to volatile organic compound (VOC) regulations is required. When properly applied, this finish can last up to three years.
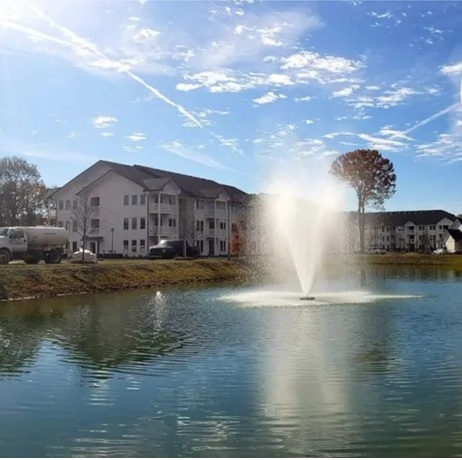
Both of these coating systems can also be used for fountains and ponds.
Epoxy
This paint option creates a tough, durable finish with unsurpassed stain, chemical, and abrasion resistance. Epoxy can be an excellent alternative to re-plastering; two coats of a high-build epoxy will achieve a hard, abrasion-resistant surface that costs one-third less than expensive resurfacing finishes. With proper preparation, a high-build epoxy finish can last up to eight years. Traditional epoxy will last approximately five years.
Remember to also consider self-priming paints that will reduce the amount of time needed to complete the job and save money by avoiding the purchase of a primer. These paints eliminate the need to apply a primer before applying the first layer of paint.
Pro tip: Always check into the VOC regulations where the pool is being painted before purchasing a coating product as regulations vary in Canada and the United States.
Paint selection begins by determining what type of coating is currently on the pool.
“Unfortunately, with many pools we end up having to paint, we must deal with a pool that has many, many layers of built-up paint,” says Dan Lenz, the manager of All Seasons Pools in Illinois. “Most of what we see here in the Midwest is epoxy, but you could be dealing with a pool that has more than one type of paint under the various layers.”
Some pool paint suppliers offer a free paint chip analysis, which can be very helpful—especially with pools that have many layers of old paint.
To prevent an expensive mistake, a paint chip should be sent to the paint supplier for analysis, as they can provide information such as thickness, number of coats present, and integrity of adhesion—as well as make recommendations for the best paint to use in the particular pool application.
“When we don’t have access to paint chip analysis, we do our own ‘solvent’ test, in which we take a paint chip and drop it in solvent,” explains Lenz. “If it’s epoxy paint, nothing happens to the chip; however, if it’s a rubber-based paint, the chip will dissolve or get mushy (and will become softer).”
If the pool is currently coated with an epoxy, this paint must continue to be used as other rubber and water-based paints will not adhere to it. Always select the same type of coating to ensure compatibility.
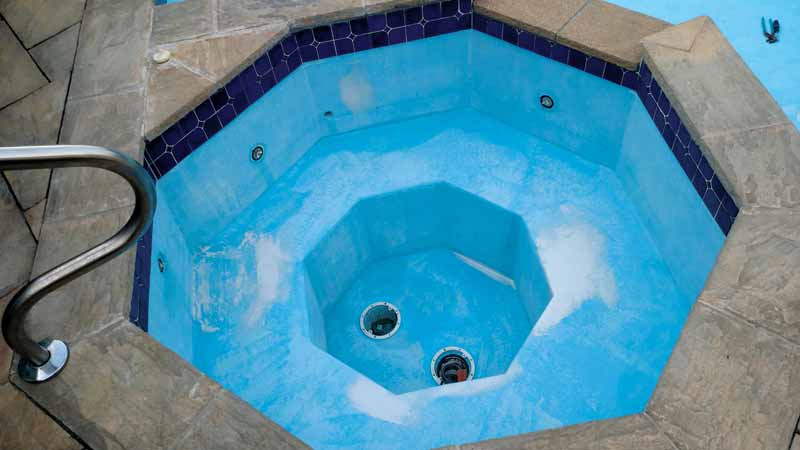
Pro tip: Some plaster surfaces that show signs of serious deterioration should be resurfaced first, before painting. Acute flaking, chipping, or peeling may indicate a surface that is soon to fail. If the surface is not suitable, the paint will peel and remove the plaster with it. Painting a pool with a two-coat epoxy paint system can prolong the life of the plaster, but only if the pool’s surface is in good, sound condition. That said, paint is not a solution for a failing plaster surface; therefore, surface preparation is extremely important. Whatever type of coating is being used, it will adhere best to a solid and clean surface.
Inspect and prepare the pool surface
Once one has determined the best type of paint to use on the pool, the next step is to carefully inspect the pool surface and repair any minor damage. To do this properly, the following steps must be taken:
Preparing the surface before beginning to paint is very important.
“We sand or water blast the surface so we can get to bare concrete before painting,” says Lenz. “After water blasting, it is important not to paint too soon because moisture can remain on the surface and prevent the paint from going on smoothly.”
Clean the surface
The pool surface must be completely clean and free of loose paint, dirt, oils, or solutions before applying a new coating system. There are products designed specifically for pool surface preparation, and using them is highly recommended. In most cases, these products can reduce the amount of time needed to clean the pool’s surface, allowing the job to be completed with just one step in one-third the amount of time.
Pool professionals who are not using a specialty ‘clean and prep’ product should use the following three-step process:
Pro tip: A clean, bare concrete or plaster surface that is ready for painting should have the texture of medium-grade sandpaper.
“We like to clean the surface with trisodium phosphate as it has a detergent that neutralizes the acids that remain on the pool surface from previous painting or cleaning,” says Lenz.
Outdoor pools that are not covered during the winter accumulate all types of fall foliage and debris, which can affect the painted surface. Unfortunately, sometimes industry standard cleanup procedures can adversely affect the success of painting a pool.
“In the past, we would acid wash pools to clean up the debris before we opened them for the summer,” says Lenz. “However, we discovered the acid wash not only removes the leaves and organic debris, but also often strips away layers of paint.”
According to Lenz, this is one of the reasons his company recommends homeowners put a safety cover on outdoor pools—not just for safety, but also for preserving the painted surface over the winter.
Pro tip: Always wear rubber gloves and protective eyewear when handling chemicals and paints. Pool professionals should always follow all safety precautions on power equipment being used, too.
The type of coating being applied will dictate how dry the surface must be before the process can begin. Acrylic paint can be applied to a damp surface; however, it must be completely dry when using epoxy paint. In any case, a pool professional should check the instructions on the product label to determine the dryness requirements. Moisture may still be present even if a surface looks and feels dry; therefore, pool professionals should use the following steps to test for dryness:
When applying the pool coating, it is important to adhere to the recommended coverage. Paint that is applied too thin will not provide adequate coverage or yield a long-lasting result; whereas a thick coat may cause air bubbles, ‘alligatoring,’ or blistering.
Pro tip: Pool professionals should avoid painting if the temperature is below 10 C (50 F), above 29.4 C (85 F), or if the overnight temperature will drop below 10 C (50 F). If the temperature is above 29.4 C (85 F), the paint can blister. Temperatures under 10 C (50 F) will cause the paint formula to become more ‘viscous’ or thickened, making it difficult to apply the coat evenly.
A water-based paint will be susceptible to freezing, which can change the formula properties. Pool paints are designed to dry and cure within a defined temperature range. The chemicals that make up the paint require the proper temperature to bond together and adhere to the surface. If the paint is not able to cure, uneven coverage, peeling, bubbling, cracking, and other problems can occur.
In addition, do not paint in direct sunlight as it will affect adhesion, primarily because it causes the paint to dry too quickly. The solvents in the formula will not be able to evaporate properly and result in adhesion failure. High temperatures can cause the paint to bubble and blister, which results in peeling once it cures.
To apply pool paint correctly, it is important to use these best practices from the field:
“The ‘time’ between coats of paint can get tricky on pools that are outdoors—especially if it rains between coats of paint,” says Lenz. “Rain can really slow down the process as the painting of the second coat typically needs to happen within eight to 48 hours.
“In our experience, once you get beyond the 48-hour mark, the second coat won’t bond to the first. When this happens, you need to roughen the surface of the first coat to get the second coat to stick. We end up having to do this manually to get the second coat to adhere, which is terribly time consuming.”
Pro tip: If rain interrupts the pool painting progress, a good rule of thumb is to add one day for the surface to dry for each day of rain.
Some pool professionals may be eager to refill the pool once they have finished painting the surface so it can be opened quickly for use. However, allowing adequate drying time (specified on the product label) is the last step to a successful pool paint application. To be certain, it is a good idea to repeat the dryness test mentioned earlier. After confirming the new coating is completely dry, the pool can be refilled using a constant, steady stream of water.
The pool’s water chemistry should be routinely monitored to keep the paint looking new and vibrant. Should levels go out of balance, the water may appear cloudy and/or the paint may wear too quickly.
It is very important to keep water chemistry in balance to avoid problems such as ‘chalking.’ Making sure the water chemistry is balanced is key in pools and spas that are painted.
Painting pools is one of the most economical ways to keep them looking good and performing well. Repainting the pool also offers the opportunity to discuss renovating the pool’s surrounding decks.
Acrylic water-based deck paints can upgrade and renovate many different types of surfaces. Proper planning, surface preparation, and using best practices from the field will help ensure amazing results. Before embarking on the next pool painting project, take the time to get a paint chip analysis of the paint currently on the pool surface and choose a paint that is formulated with quality raw materials and best manufacturing processes to achieve the best results and complete the job successfully.
[7]Kevin Harrington is the division manager of the Ramuc Pool Paint Company, located in Rockaway, NJ. A graduate of Rutgers University, Harrington has been in the coatings industry for more than 41 years. As an industry veteran, he has vast product knowledge and extensive industry experience making him the go-to person for those seeking expertise in aquatic coatings. Harrington can be reached via e-mail at kharrington@ramucpoolpaint.com.
Source URL: https://www.poolspamarketing.com/trade/features/techniques/pool-restoration-painting-tips-and-tricks-selecting-and-applying-coating-products/
Copyright ©2025 Pool & Spa Marketing unless otherwise noted.