by Sally Bouorm | April 1, 2010 11:28 am
By Bruce Aubrey
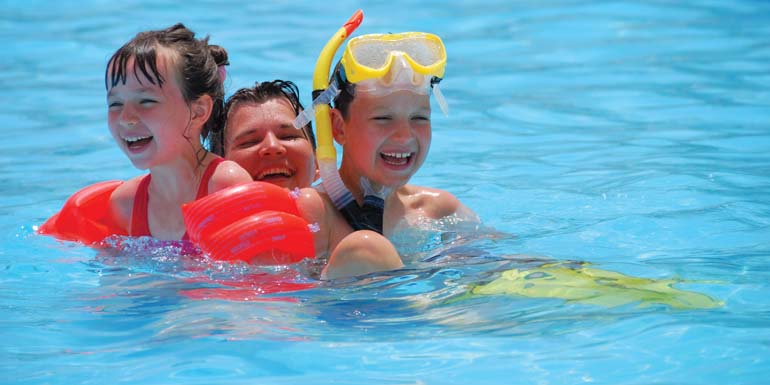
A warm, inviting pool to start the day off with some exercise—or a hot tub to relax in after a stressful day—require the reliable performance of a gas pool heater. Properly installed and maintained, a gas-fired pool heater will provide many years of pool owner satisfaction, while increasing the usage and enjoyment of the pool and hot tub.
Gas pool heaters burn either natural gas or propane fuel in the heater’s combustion chamber. This generates the heat that is transferred to the pool water as it is circulated by the pump through the filter and the heater, and then returned back to the pool.
The rapid heating ability of gas-fired heaters is what maintains their position as the most popular heating method for swimming pools and spas. Today’s electronic ignition systems, combined with fan-assisted combustion, have much higher efficiencies when compared to the milli-volt ignition and atmospheric combustion systems of years’ past. The result is an easing in the cost of operation, which in turn encourages more use of the pool and hot tub.
Many existing heaters on equipment pads have thermal efficiency ratings of 75 per cent, while most new heaters are rated at 82 to 84 per cent. This means saving energy; being environmentally responsible with low NOx emissions and having lower annual maintenance costs. It should be noted, depending on climate and pool use, a heat pump may be the most energy efficient pool heating option for a pool owner. But for the purpose of this article we will focus on gas-fuelled heaters.
There are many gas heaters on the market, but choosing a fan-assisted combustion heater provides the most energy-efficient heater and the most environmentally responsible choice available.
Fan-assisted heaters provide the best fuel/air combustion to ensure fuel is not wasted. They also provide high performance in windy areas where atmospheric heaters could experience down drafting. This can cause damage and shorten the life of the heater.
It is also important to ensure the heater is hydraulically efficient and has the lowest possible resistance to flow. Eliminating resistance within the equipment pad plumbing allows smaller pumps or lower speeds to be used to circulate the pool water for increased energy savings.
The key to a properly installed and performing gas pool heater begins with selecting an appropriately sized heater (in British thermal units [BTUs]), which aligns with the fuel source available. Then, the heater must be positioned to achieve proper clearances for performance, maintenance and safety.
Whether installing a gas heater on a new equipment pad or replacing an existing system, a thorough understanding of the fuel source is necessary to ensure meters and fuel lines are sized properly for the gas heater being considered. When replacing an existing heater installation, it may be necessary to downsize to a smaller heater, as today’s more efficient fan-assisted combustion heaters require exact gas pressure to operate properly.
A smaller heater, which aligns with the gas source available, will almost always result in improved heater performance and swimming pool and hot tub heating due to its more efficient combustion process. Again, always evaluate the existing or planned gas line and meter to ensure the heater being installed will operate correctly and efficiently.
Before starting any gas heater installation, it is imperative that the installation and operating instructions supplied with the chosen heater be thoroughly read and understood. Additionally, all gas heaters must be installed in accordance with all local and provincial/state codes. Installation must also conform to the latest edition of the National Fuel Gas Code (American National Standards Institute [ANSI] Z223.1/National Fire Protection Association [NFPA] 54) and with the requirements of the authority having jurisdiction.
Selection of a specific gas heater, after gaining an understanding of the available fuel source, requires two basic considerations: size and cost of operation. Size of the gas heater should be maximized to provide the most rapid heating of the pool or hot tub as possible. An undersized gas heater will surely result in complaints from the owner with regards to the pool or hot tub not heating up fast enough.
To estimate heater size use 10 Btus every hour for every 0.1 m2 (1 sf) of pool surface area for every one-degree temperature rise. For example, a 4.5 x 9.1-m (15 x 30-ft) swimming pool yields 42 m2 (450 sf). To increase this pool’s temperature by one degree would require a 4,500 Btu heater. Assuming a 20 degree temperature rise is desired, 90,000 Btus per hour would be required to hold the temperature. In a 24-hour day, that would equate to a total of 2,160,000 Btus. In dividing this by the pool pump’s eight-hour per day circulation time, it shows a gas heater capable of 270,000 Btus per hour is required. It is important to note gas pool heaters are rated in Btus per hour of input. Therefore, a heater at 400,000 Btu per hour input with a thermal efficiency of 82 per cent will generate an output of 328,000 Btus.
The cost to operate this type of natural gas heater can be determined based on the cost of a therm (100,000 Btu/hour of heat) of gas.
Continuing with the example, dividing 400,000 Btus/hour by 100,000 Btus/hour results in four therms/hour. This result is then multiplied by the circulation pump’s eight-hour-per-day run time to determine 32 therms/day are required to run the heater. Assuming a cost of $1.10 per therm, it will cost $35.20 per day to operate.
The proper location of the heater must be determined for new installations or verified for a replacement installation. Care should be taken to choose a location where leakage from the heat exchanger or plumbing connections will not result in damage to adjacent areas or structures.
The heater must be installed so installation and service clearances from combustible surfaces can be maintained per the manufacturers’ specific requirements. Additionally, the heater must be properly installed so its exhaust vent is properly located and spaced relative to adjacent walkways, buildings, opening windows and building openings to comply with the National Fuel Gas Code.
Indoor heater installations are more complex and require specific selection of the appropriate exhaust gas vent sizes and materials. In addition, it must be ensured proper combustion air and ventilation air is adequately supplied to the heater. Consult the specific instructions for indoor installations found in each manufacturer’s installation guidelines and consult local code experts prior to starting any indoor gas heater installation.
With the heater location now determined and the heater positioned, the installation of the gas line, plumbing connections and electricity can begin. The normal sequence of installation is: gas line connection, plumbing inlet and outlet water connections and high- and low-voltage electrical connections.
When replacing a heater, generally the new heater is simply connected to the existing gas line. However, it is important to understand the key elements, which influenced the original installation to ensure the gas supply is adequate and safe. Each heater manufacturer specifies the proper gas piping size to deliver an adequate supply of gas to the heater, which is dependent on the heater’s Btu size and its distance from the gas source (i.e. a natural gas meter or a propane tank.)
The gas supply connection must include a Canadian Standards Association (CSA)-certified main gas shutoff valve outside the heater cabinet. This shutoff valve must have an inside diameter large enough to supply the proper amount of gas volume to the heater. Subject to local codes, a sediment trap may be required, which comprises a drop-of-pipe off a ‘T-fitting’ to collect impurities in the gas before getting to the heater. It also includes a threaded union outside the heater cabinet allowing the heater to be easily serviced.
Use appropriate soap and water solutions to check the gas connection for leaks and fix even the smallest leak immediately. Do not use an open flame to check for gas leaks, as an explosion can result causing severe injury or death.
Gas-pressure testing is one of the last steps to ensure the proper operation of the burners in the heater. It is performed following connection of the plumbing and field electrical supply. This will be discussed later in this article.
Continuing with the installation sequence, the next area to focus on is the inlet and outlet plumbing connections. Gas pool heaters are typically designed for use with pool and hot tub water only, as furnished by municipal water distribution systems.
Usage with mineral water, seawater (with more than 4,000 parts per million [ppm] of salt) or other non-potable waters will likely void the manufacturer warranty. The plumbing system must also be designed so water flow from the heater return to the pool/hot tub cannot be blocked. (Any blockage could result in fire or explosion causing property damage, personal injury or loss of life).
Today, the vast majority of gas heaters are equipped with chlorinated polyvinyl chloride (CPVC) flanged pipe nipples, union nuts and o-rings (or seals) to ease attachment of inlet and outlet water connections. They also serve to facilitate easy removal of the plumbing connections via the union fittings for winterization or service of the heater. It is recommended to assemble the union fittings and pipe nipples to the heater prior to gluing the fittings to the nipple ends. Today’s heaters do not require heat sinks, heat tapes or fireman switches, which may be present on an older heater being replaced.
With the inlet and outlet plumbing connections in place, it is important to understand proper water flow must be maintained to the heater. Minimum and maximum flow rates are stated in the installation instructions for each manufacture’s specific heater. If the flow rates are not maintained under all operating conditions, heat exchanger damage and/or failure will result and may void the manufacturer warranty. A flow meter, installed on the outlet line of the heater, is recommended to monitor water flow.
The final necessity is the electrical supply connection. Electronic ignition and electronic ignition fan-assisted heaters all require an electrical connection to operate the electronic control, ignition system components and combustion fan. Most heaters are shipped from the factory wired for use with a 240-volt AC, 60-Hz field power supply, but are capable of being converted for installations requiring 120 VAC, 60 Hz.
To avoid blown fuses and damage to electronic components, which can void manufacturer warranties, verify the field supply voltage and the heater supply voltage are the same prior to wiring. All wiring connections to the heater must be made in accordance with the latest edition of the National Electrical Code ANSI/NFPA 70, unless local code requirements specify otherwise. The heater must be electrically grounded and bonded in accordance with local codes or, in the absence of local codes, ANSI/NFPA 70.
Remote control connection is quite common for regulating water temperature and switching between pool and hot tub modes. These are low-voltage connections made to a terminal block located inside the heater cabinet. These connections should be made in accordance with the manufacturer’s instructions.
Upon completion of the gas, water and high-and-low voltage electrical connections, an installation check and a general startup is necessary. This is essential to verify all gas, water and electrical connections have been properly made and no leaks, gas supply or water flow issues are present.
Water must be flowing through the heater during operation. Check the pump is operating and the system is filled with water and purged of all air prior to starting the heater.
The gas heater and its gas connection must be leak-tested before placing the heater into operation. The heater must be isolated from the gas supply piping system by closing the manual shutoff valve during any pressure testing. After pressure testing, turn the gas supply on and test all pipe and tubing joints for leaks using a soap and water solution.
Gas pressure testing ensures the heater’s burners operate properly. Improper gas pressure or gas volume will create a flame, which burns completely yellow, lifts off the burner and generates soot on the heat exchanger.
Gas supply (i.e. the available amount of gas with which the heater is supplied) can be accurately checked on the incoming and manifold side of the heater’s gas valve (with the gas valve on). A manometer will be required to read pressure in inches of water column and all gas pressure verification testing should be conducted per the manufacturer’s specific instructions found in their installation or operating manual(s).
If gas pressure is determined to be inadequate, check for undersized piping between the gas meter and the heater or for a low-capacity gas meter.
The necessities for gas heater installation focused on in this article are the key elements to a basic gas heater installation. During the installation check and general startup, with all connections properly made and the gas pressure correct, the heater should fire and function as planned.
If the heater fails to fire, additional checks, inspection and/or adjustment of the water pressure switch, temperature/remote control and other items as recommended in the manufacturer’s installation manual will need to be addressed to ensure the heater operates properly and safely.
Fault codes are evident via the electronic control and can be very helpful in guiding the installer to problematic areas. There are many potential combinations of causes for a heater to malfunction. So, a thorough look at the entire system and installation is required, along with some flexible thinking to resolve the problem(s).
Gas pool heaters are built to provide a long performance life when installed, operated and maintained properly. To keep the heater working properly, regular inspection by qualified service personnel is recommended.
Keeping vent areas on top of the heater clear of obstructions, while ensuring clearances are maintained for combustion and ventilation air around the heater are critical to its long life and reliable performance. Some parts of the country will also require winterization or draining of the heater to prevent freeze damage. This can be done by following the manufacturer instructions.
A safe and reliable gas heater installation will provide many years of pool owner satisfaction while increasing the usage and enjoyment of the swimming pool and hot tub.
Bruce Aubrey, product manager with Hayward Industries Inc. He has been in the swimming pool industry for more than 10 years in a variety of roles including marketing, product engineering and design. He can be reached via e-mail at baubrey@haywardnet.com[5].
Source URL: https://www.poolspamarketing.com/trade/gas-heaters-are-built-to-last/
Copyright ©2025 Pool & Spa Marketing unless otherwise noted.