Installation tips for prefabricated modular pool slides
by Sally Bouorm | March 1, 2013 10:58 am
 [1]
[1]By Kathryn Varden
Everyone smiles when they think back to those childhood days of summer pool parties. Many have fond memories of friends cannonballing off the diving board or swooshing down the slide into the pool. Parents today want the same experience for their children, but how do they tear them away from the Internet or video games to get them outside and play? Easy—build them a fun backyard pool with a waterpark-like slide.
Many pool owners want a place for the kids to play, yet still have an esthetically pleasing pool in their backyard—similar to what can be found at a luxury resort hotel in a tropical locale. This trend translates into more upsell opportunities for pool dealers. Although most homeowners cannot afford to create a resort-like backyard waterpark, dealers can still offer various slide configurations to fit any budget.
Standard slides, made out of acrylic or roto-moulded plastic and simply mounted on the pool deck, are the most popular as they can be easily added to an existing pool or new construction project. In the last 10 years, these slides have come a long way in terms of colour selection, runway styles, and safety features. Prices vary by manufacturer; however, they typically cost between $1,500 to $4,000 (installed).
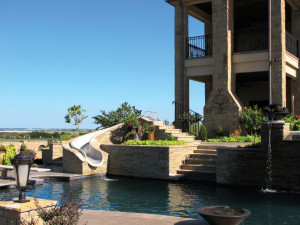
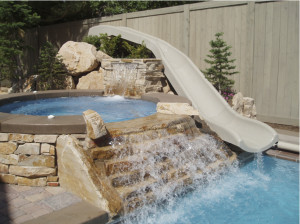
For more high-end installations, custom slides are also becoming increasingly popular as they provide a resort-style attraction to the backyard pool. These custom slides can be constructed of tile, gunite/concrete, or pre-fabricated modular flume pieces. Pre-fabricated models are generally made out of commercial-grade fibreglass and have a gel coating. In most cases, these slides are included in the design of new construction projects or during major pool renovations. These vary in price between $5,000 to $15,000 depending on how many twists, turns, and features they offer. The most popular custom slides are those designed to wrap around a rock-grotto waterfall or come cascading down a landscaped hillside.
Benefits of modular slide systems
One of the advantages of incorporating a modular slide system into a swimming pool design is that it provides builders with a better idea of what the completed slide will look like and any guesswork involved in configuring its slope is eliminated. Typically, a modular slide manufacturer can provide a builder with a CAD drawing of the slide as well as a DWG (DraWinG) binary file, which stores 2-D and 3-D design data that they can import into their computer drawing. Further, modular slides are available in a variety of colours, allowing them to be easily integrated into most backyard landscapes.
With help from the slide manufacturer’s engineering department, builders can safely incorporate various flume pieces into endless configurations to provide the homeowner with a one-of-a-kind custom pool slide.
Further, thanks to innovations in design and construction, along with their ease of installation, an increasing number of builders are now installing these slides. In fact, one of the most popular choices among pool builders are slides manufactured using resin transfer moulding (RTM) technology to create gel-coated fibreglass flume pieces that are strong, lightweight, and easy to install.
Most manufacturers offer a number of different flume pieces in either 15- or 30-degree slopes with a single water-delivery system.
Is bigger better?
 [2]
[2]For pool builders, the bigger the slide the more potential there is for higher profits, while for pool owners, the larger the slide the more thrill and excitement.
To appease this market, manufacturers have developed flume systems that are wider, deeper, and deliver more water using double-waterway delivery systems. Further, these larger slides typically have a 158-kg (350-lbs) weight limit, allowing every member of the family to enjoy the slide.
Although slide lengths will vary, they typically average 4.5 m (15 ft) in length. Longer slides average between 9 to 12 m (30 to 40 ft). When it comes to size, a good rule of thumb for builders to keep in mind is for every 0.3 m (1 ft) of the slide that is built vertically, it should be built out 0.9 m (3 ft) horizontally.
Getting started
There are three key items builders need to have before designing a modular slide:
- The height of the slide at the seat section (above the main deck or zero-grade).
- The height of the slide at the exit section (above the main deck or zero-grade). Note: the height of the slide’s exit should not be more than 508 mm (20 in.) above the pool’s water line.
- A sketch of how the slide should look.
 [3]This information is required before contacting the slide manufacturer to ensure the right slide is designed for the project. Costs will vary depending on how complicated the design is; the more twists and turns, the more expensive the slide. The colour selected by the homeowner will also factor in the overall cost.
Most pool dealers sell slides/waterfalls in packages, similar to a car dealer who offers upgrade features. For example, option ‘A’ could comprise a one-turn slide with a small waterfall package; option ‘B’ could include a one-turn slide with a larger waterfall package; and option ‘C’ could offer a two-turn slide with an ultimate waterfall package. Let the homeowner decide how much they are willing to spend.
Further, by offering a limited number of options, the installation crew will know what needs to be completed for each modular slide package, which helps keep the company’s construction costs under control.
If the homeowner decides they do not want a pre-set option, but rather their own ‘design,’ then a new quote can be easily and quickly generated.
Safety is also a concern during the design stage. For instance, most manufacturers test and model the flume system in an engineering program to ensure each slide is safe. For builders, when designing a pool with a modular slide, it is important to keep in mind that most people throw their hands up in the air while sliding down. Therefore, the design should not include any rocks or other landscape features that protrude into the path of the slide that can hurt a bather’s arms and hands. A water safety envelope in the pool that is centred on the slide and is a minimum 2 m (6.5 ft) wide by 4 m (13.5 ft) long and 1.2 m (4 ft) deep is also recommended. Builders should check with the manufacturer as the water safety envelope may vary by slide type and size.
Modular assembly
 [4]
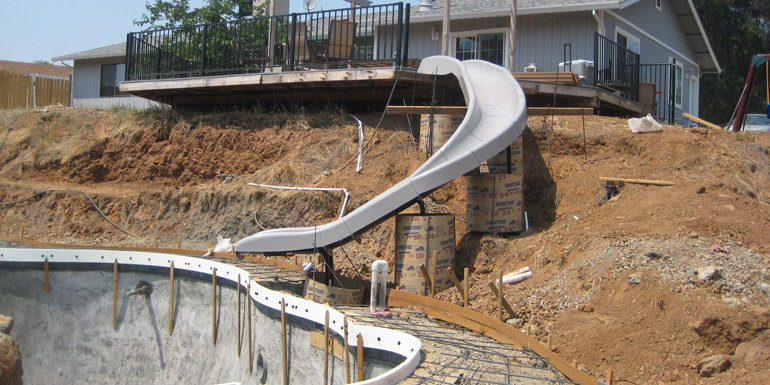
[4]Installing a modular pool slide is generally easy. First, start by levelling the area where the slide is being installed to the approximate final grade. Then, remove the flume pieces from the packaging and lay them out in the correct order (right side up to avoid scratching the surface of the slide). If possible, assemble the flumes close to where the slide is being installed, starting with the exit section and working upwards matching each section together. Depending on the manufacturer, the flumes are typically marked to make assembly easier. For example, attach ‘A’ of the exit section to ‘A’ of the next flume.
Anchor supports are also typically labelled for each specified location and should be installed as the slide is assembled upwards, away from the pool.
Once assembled, hand-tighten all of the hardware feeling the inside of the flume pieces to ensure the inner portion of the slide is even. Finally, using a torque wrench, slowly tighten each nut in an alternating fashion, working from left to right, starting with the centre bolt. This will compress the gasket evenly to prevent leaks. After all of the flume sections are assembled and the flange bolts are correctly tightened, a water test should be performed using a garden hose to ensure there are no flume-to-flume leaks.
Marking supports
With the slide now assembled and resting in its correct horizontal position, carefully mark the location of the anchor supports using spray paint. When finished, move the slide to one side (if working with a longer slide it may be necessary to split it into two sections) and install the flume supports where the paint marks are located.
Pier holes for the anchor supports should be a minimum of 305 mm (12 in.) long, by 610 mm (24 in.) wide, and 610 mm (24 in.) deep. Each manufacturer has specified minimums for the concrete piers; however, they may need to be increased due to local weather, soil conditions, frost line, and/or local building codes.
Anchors away
The slide needs to be attached to the anchor supports before they are cemented in place to ensure it is sitting at the proper slope. To check the slope, use an angle finder and measure the inner flume at multiple locations, starting from the top of the slide. If the slope is greater than intended, the rider may go too fast and will not slide down the pathway safely. If the slope is not enough, the rider might not make it to the end. It is also important to make sure the entry and exit points are level.
Once the slide is level and the slope is correct, pour the concrete around the anchor supports and allow it to cure. Recheck and adjust as necessary as the concrete piers are being poured. After the installation is complete, cover the slide to prevent scratches from any remaining landscape or rockwork.
In the end, it is a win-win situation for both the homeowner and the pool builder. The custom backyard waterslide is a great profit opportunity for the dealer, while at the same time the homeowner gets what they want—a backyard-like resort to create long-lasting memories.
 Kathryn Varden is the western regional sales manager for Inter-Fab Inc., in Tucson, Ariz. She has been working with pool builders for more than 10 years assisting them in selling and installing slides and diving boards in both new construction and renovation applications. Varden holds a master’s degree in landscape architecture and a bachelor of science in regional development from the University of Arizona. She can be reached via e-mail at kathryn@inter-fab.com[5].
- [Image]: http://poolspamarketing.com/wp-content/uploads/2013/03/byos-aqua-install-1.jpg
- [Image]: http://www.poolspas.ca/wp-content/uploads/2015/05/BYOS2_by_Inter-Fab.jpg
- [Image]: http://www.poolspas.ca/wp-content/uploads/2015/05/BYOS_slide_waterfall_with_slide.jpg
- [Image]: http://www.poolspas.ca/wp-content/uploads/2015/05/BYOS_Clear_Choice_Po318570.jpg
- kathryn@inter-fab.com: mailto:kathryn@inter-fab.com
Source URL: https://www.poolspamarketing.com/trade/installation-tips-for-prefabricated-modular-pool-slides/