The home stretch

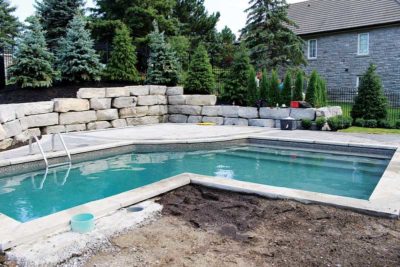
The next day comprised plumbing the pool, backfilling it with 19.1 mm (0.75 in.) of clear gravel, and pouring the second stage of the concrete pool floor (i.e. grouting). The final stage of the pool build was installing the cement collar to accept the natural stone coping. Once this stage was completed, the landscape work commenced, and the pool perimeter was prepped for the pool coping. After pouring a concrete collar around the pool perimeter, natural stone coping was installed.
The slate grey coping features an unusual dark grey to black high-quality sandstone finish. Each piece has its own individual colour, texture, and markings. Natural-stone coping lids were also cut to replace the traditional-style plastic skimmer lids offered with the pool. A few pieces of matching 24-mm (1-in.) flagstone were used around the skimmer and drainage pit (sump well) adjacent to the pool.
For homeowners, picking a patio design and colour scheme can be one of the most difficult decisions to make. Similar to the car industry, there are several manufacturers of interlock products which vary in size, colour, shape, and cost. That said, this was not a quick decision for the homeowner. For some clients, it usually takes a few trips to a stone yard, along with several hours of looking at various photos online and, in some cases, delivering samples to the client.
This particular project was completed using stones from two different manufacturers. The main seating area adjacent to the pool features a grey flagstone, while the main patio was completed using a trendy paver that features the effect of cut stone. Its rich texture, irregular edges, and chiseled finish were inspired by the use of solid materials such as limestone and slate. Both pavers provide the perfect contrast, while co-ordinating with the different elements used throughout the project to create a cohesive look.


